




A Photo Kit That Every PMU Portfolio Should Own

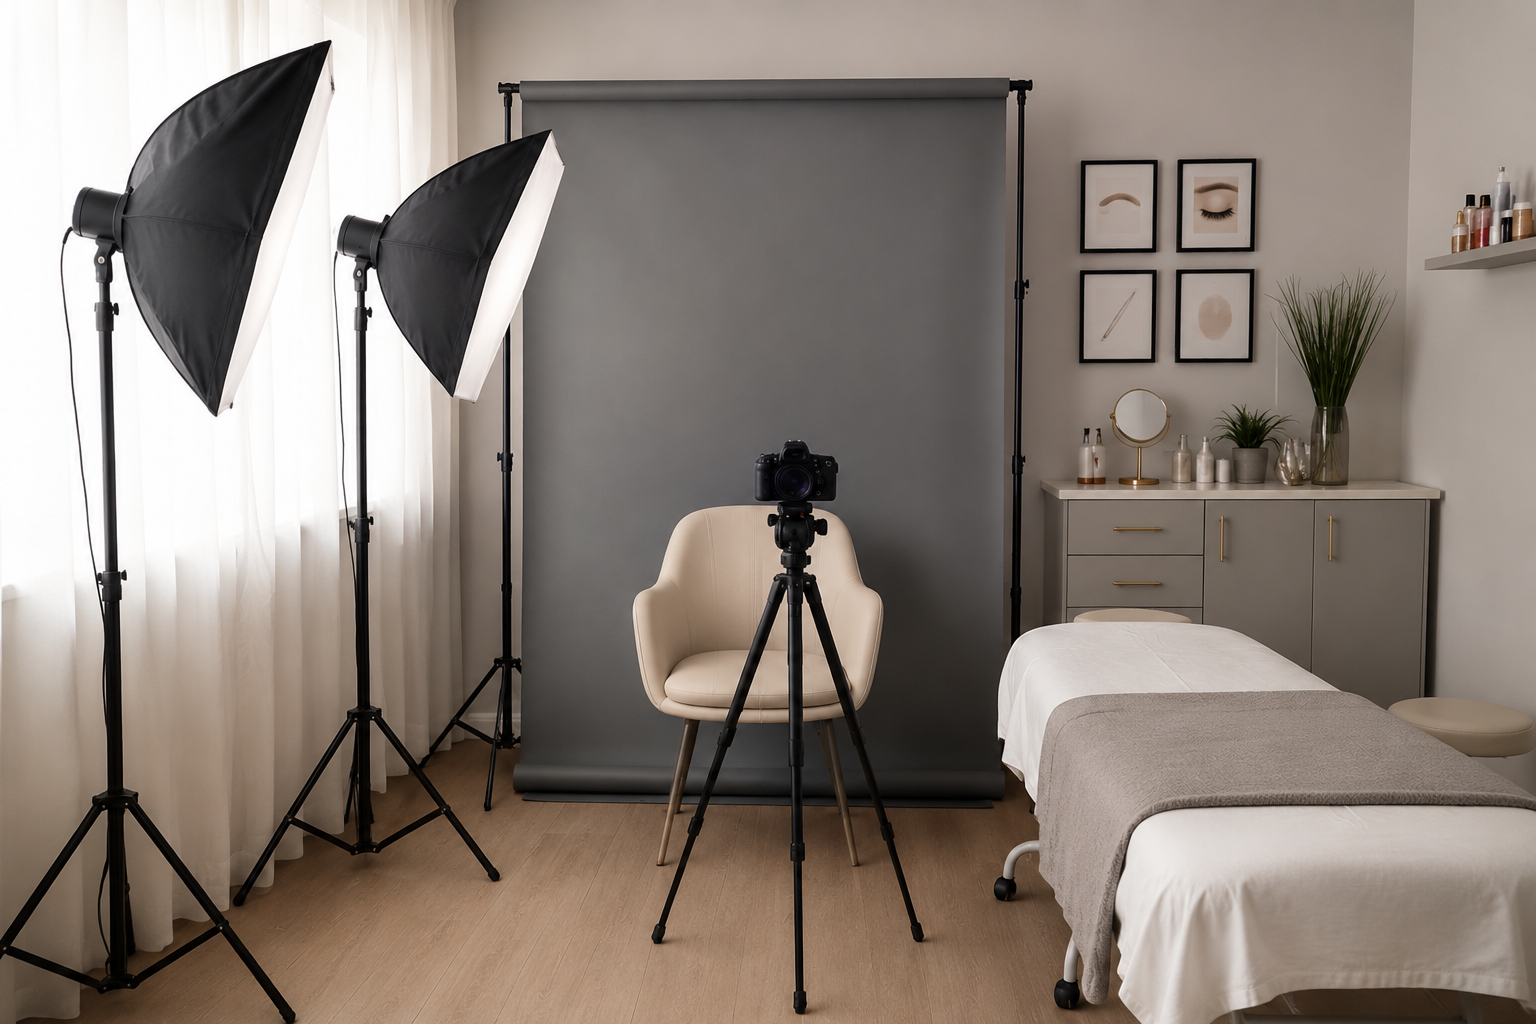
A credible PMU portfolio does not require prestige equipment. It requires a repeatable photo station: a device you can position consistently, stable lighting, a neutral background, and a workflow for consent, labeling, and secure file handling. Avoid close wide-angle facial shots, distinguish fresh work from healed work, and keep edits limited to honest exposure and color correction.
The goal is not to make every result look dramatic. It is to document brows, eyeliner, and lips in a way that lets prospective clients see the treatment clearly and compare images fairly.
Build the Minimum Viable PMU Photo Kit

Start with the pieces that solve the most common portfolio problems: blur, distorted facial perspective, inconsistent framing, changing light, and disorganized files.
Your basic kit should include:
- A phone or camera you can use consistently. A current smartphone can be a practical starting point when it produces clear images and can be used from the same position each time.
- A stable mount or tripod. This helps keep camera height, distance, and framing consistent between appointments and follow-ups.
- A fixed lighting setup. Choose a setup you can leave in the same place or recreate reliably. The priority is repeatability, not a particular light style.
- A neutral, uncluttered background. It keeps attention on the PMU result rather than studio distractions.
- A marked client position. A simple floor marker or repeatable chair placement makes it easier to recreate the same angle later.
- A file-labeling system. Use a client code, procedure, view, image stage, and capture date so images remain useful after the appointment.
- A consent and storage process. Decide before taking photos whether images are for internal documentation, marketing, or both.
Keep the station practical for a working treatment room. Position cables so they do not interfere with client movement, and choose equipment that can be handled without disrupting the treatment workflow.
Choose a Phone or Camera for Perspective Control
A phone is enough to begin if you can produce sharp, consistently framed images from the same client and camera position. Before buying a dedicated camera, test your existing device: photograph the same brow or lip area on several days using unchanged distance, angle, lighting arrangement, and framing. If the images remain clear and comparable, your current phone may be serving the portfolio well.
Consider a dedicated camera when you need more deliberate control over framing and perspective, or when multiple artists need to follow one standardized studio protocol.
Perspective matters because close facial photography can change how features appear. A 24 mm wide-angle lens used close to the face can make nearer features, such as the nose, appear larger and ears smaller. General portrait guidance places headshots in an 85--135 mm range for a more natural-looking perspective, while warning that very long focal lengths can overly compress facial features in headshot work. Portrait focal-length guidance is not PMU-specific testing, but it offers a useful reason to avoid extreme wide or long perspectives when documenting facial procedures.
For PMU, the practical lesson is simple: do not move close with a wide-angle view just to fill the frame. Keep your setup consistent, then crop only when that does not change the apparent result.
Make Lighting and Framing Repeatable

Lighting should help you see the work clearly without turning the image into a stylized beauty portrait. There is no single light type that can be assumed to show PMU pigment accurately in every room, on every skin tone, or at every healing stage. What matters most is using the same lighting arrangement for comparable images.
Create a fixed capture routine:
- Place the client in the same chair position.
- Use the same background.
- Set the camera or phone at the same height and distance.
- Ask for the same head position, expression, and eye direction.
- Capture the same sequence of views for each procedure.
- Record whether the image is before, fresh, healed, or post-touch-up.
For brow work, include a clear straight-on view and consistent angled views. For eyeliner and lips, use the same principle: repeat the angles that best show symmetry, placement, and visible treatment detail without changing the client's pose or expression.
A before-and-after comparison is only useful when the images are comparable. A more flattering pose, different light placement, altered camera angle, or tighter crop can make a change look larger than it is.
Separate Fresh, Healed, and Touch-up Images

Fresh PMU images have a place in a portfolio, but they should never be presented as healed results. Label the stage clearly in both the file name and the caption.
A practical labeling structure might look like:
- Client code
- Procedure
- View
- Stage: before, fresh, healed, or touch-up
- Capture date
For example: Client-042_Brows_Front_Healed_Date
One PMU portfolio reference point identifies 6--8 weeks as a timeframe for a healed-result image. Healing appearance and timing can vary by client and procedure, so treat this as a portfolio-planning reference rather than a promise about final results.
A balanced portfolio should show more than immediate post-procedure images. Fresh photos can demonstrate design and placement; healed photos help show how the work presents after the healing period. Touch-up images should also be labeled so viewers understand what stage of the process they are seeing.
Keep Editing Honest and Limited
Editing should correct the photograph, not alter the PMU result.
Appropriate adjustments can include limited exposure and color correction using a neutral reference. Preserve the original file so you can maintain a transparent record of what was captured.
Avoid edits that change the apparent treatment outcome, including:
- Beauty filters
- Skin smoothing
- Facial reshaping
- Stroke enhancement or fabrication
- Pigment-color manipulation
- Blur that hides texture or healing detail
- Cropping that removes relevant context from a comparison
A portfolio image should not suggest a sharper hair stroke, smoother skin surface, stronger pigment result, or more symmetrical shape than the client actually had in the captured image.
Add Consent, Privacy, and Claim Checks Before Posting
Photography for documentation and photography for marketing are separate decisions. Obtain appropriate written client permission before using identifiable images in promotional material, and handle stored images and sharing through access-controlled processes appropriate to your business and local requirements.
Before posting, confirm:
- The client gave permission for the intended use.
- The image stage is labeled accurately.
- The caption does not imply that a fresh result is healed.
- The image has not been edited in a way that changes the apparent PMU outcome.
- Any testimonial reflects the client's genuine experience.
- Any paid, discounted, gifted, family, employment, or other material relationship connected to an endorsement is disclosed where required.
When a post functions as an endorsement, the FTC states that endorsements must reflect honest opinions and experiences and must not contain claims that would be deceptive if made directly by the advertiser. Specific or superior outcome claims may also imply that consumers can generally expect those results unless adequate support or clear disclosure addresses that expectation. Review the FTC's endorsement guidance when a portfolio post includes a testimonial, compensation, or a strong results claim.
Choose a starter setup based on the phone or camera you already own, your room size, and your budget. Then create one fresh-and-healed shot checklist, use it at every appointment, and make consent, truthful labeling, and restrained editing part of your standard PMU workflow.
Legal Disclaimer
This article is provided for general informational and educational purposes only and does not constitute legal, tax, insurance, regulatory, or professional advice. Requirements may vary by jurisdiction and change over time. Consult a qualified local attorney, licensed insurance professional, accountant, or relevant regulator for advice tailored to your studio and circumstances.
