





PMU on Melanin-Rich Skin: Pigment Selection and Technique Adjustments

Key Takeaways
Successful permanent makeup on dark skin needs more than picking a deep color. You must evaluate skin depth, undertones, texture, existing color, and the goal result. PMU pigment selection and physical technique must work together. Focus on controlled depth, soft pressure, passes, and proper saturation instead of forcing more ink into the tissue. Tailor your application to each client and specific procedure.
Demand for permanent makeup is growing across diverse skin tones. Clients with deeper skin want beautiful brows, defined eyes, and warm lips. Achieving clean, predictable healed results on darker tissue takes a tailored strategy.
Color selection and physical application are equally important. This content does not create separate rules for dark skin. Instead, it explains how skin tone, undertones, surface texture, and hand technique interact.
Two main questions guide this discussion:
- How should artists choose PMU pigments for dark skin?
- What physical technique adjustments help secure predictable healed results?
What Makes Melanin-Rich Skin Different
Evaluating skin structure before opening a bottle of pigment prevents unexpected color shifts during healing.
Skin Tone Is Only One Part of the Assessment
Overall skin depth refers to how light or dark the surface appears. Undertone is the soft color beneath that surface. Undertones generally fall into warm, cool, neutral, or olive categories. Two clients with the same surface depth can have completely different underlying tones. One may have rich warm undertones, while the other carries cool, ashier notes. Using the same PMU pigment on both clients produces two completely different healed outcomes.
Consider Skin Type and Condition
Surface characteristics change how ink settles into tissue:
- Oily vs. Dry Skin: Excess oil can blur crisp lines and dilute pigment intensity over time.
- Thickness and Texture: Thicker skin may require firmer stretching, while delicate tissue needs a lighter touch.
- Elasticity and Mature Skin: Loss of firmness makes smooth pass delivery more challenging.
- Previous Treatments: Scar tissue or past procedures alter how easily the needle penetrates.
These factors directly change how much ink stays in the skin and how dark it appears once healed.
Look Beyond Fitzpatrick Skin Type
The Fitzpatrick scale groups skin by its response to sun exposure. It offers a general baseline, but it cannot reveal subtle undertones, oil production, or previous skin damage. Use Fitzpatrick ratings to support your initial assessment, not to replace a thorough face-to-face consultation.
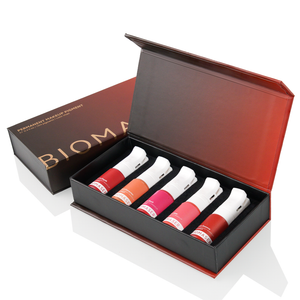
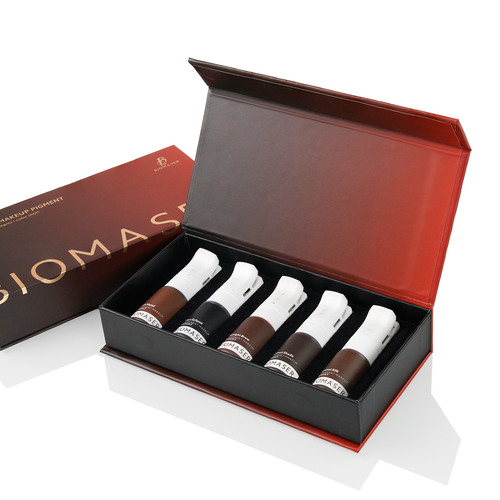
Biomaser Lips Pigment Collection
Choose PMU Pigments Based on the Healed Result
Selecting the right bottle requires predicting how melanin will filter the color once the tissue heals fully.
Balance Pigment Depth and Color Temperature
Working with PMU pigments for melanin-rich skin involves three main properties:
- Value/Depth: How light or dark the color is.
- Warmth/Coolness: The temperature bias of the ink.
- Saturation: The concentration of color within the liquid.
Grabbing the darkest bottle simply because a client has deep skin tone is a common mistake. Cold, dark ink buried under dense melanin often heals dull, gray, or blue. Balancing color temperature ensures the final result remains true and vivid.
Understand Undertones and Color Theory
Natural skin melanin acts like a tinted glass pane over your healed work. Warm, cool, neutral, and olive bases shift the visible outcome. Excessively cool permanent makeup pigments combined with cool undertones produce an ashy, muted finish.
Adding warm target shades or specific PMU pigment modifiers helps balance cool undertones. Modifiers are corrective tools designed to offset unwanted cool shifts, but they are not universal mixtures. Always choose a modifier based on the specific cool bias you need to neutralize.
Note: Do not over-dilute base pigment with modifiers; high modifier percentage may compromise long-term pigment retention.
Consider Existing Pigment
Previous tattoo work complicates your color balance. Before applying fresh ink, check for:
- Faded remnants of old designs
- Cool gray or blue shifts
- Residual red or orange tones
- High saturation levels from past sessions
Never layer fresh target colors over heavy, dark, or off-color remnants without planning a PMU color correction step first.

Adjust PMU Technique for Better Pigment Implantation
Applying pigment to deeper skin tones requires precise physical adjustments to protect tissue health and secure strong retention.
Control Implantation Depth
Pushing needles deeper into the dermis does not yield stronger retention. Deep placement causes ink to pool near blood vessels. This creates blurred edges, migration, and undesirable dark blue shifts. Focus on consistent, shallow placement in the upper dermis for crisp, stable results.
Control Pressure and Hand Speed
Melanin-rich tissue does not require heavy hand pressure. Excessive force damages skin, causes bleeding, and pushes ink out during the healing phase. Maintain a light, steady hand pressure matched with steady machine speed. Let the sharp needle tip perform the work cleanly.
Manage Passes and Saturation
Re-traumatizing the exact same path over and over causes severe inflammation. Excess trauma triggers defense responses that push pigment back out. Build color slowly over 2 to 3 light passes. Stop working the moment target saturation is visible beneath the skin surface.
Adapt the Technique to Skin Condition
Tailor stroke speed and machine speed to the physical surface:
- Oily Skin: Needs slightly open pixel spacing to prevent blurred edges.
- Thick Skin: Requires stable stretching to ensure clean needle entry.
- Mature or Thin Skin: Requires minimal pressure and fewer total passes to avoid tearing.
Adapt the Approach Across Different PMU Techniques
Core color and depth management principles apply across every area of the face, regardless of the specific tool.
Hair-Stroke and Brow Techniques
Crisp hair strokes depend on clear skin texture and precise needle depth. When picking PMU brow pigments, match depth carefully to avoid strokes blurring together. Whether using a manual blade or a digital machine, space your strokes far enough apart so they do not merge into a solid block as melanin settles over them.
Shading and Powder-Based Techniques
Powder brows rely on soft pixel building rather than solid color blocks. Deep skin tones do not automatically require heavy, dark shading. Build soft layers with a slightly warmer eyebrow pigment to achieve a smooth gradient without creating a harsh, unnatural outline.
Lip PMU and Lip Neutralization
Natural lip tissue often holds deep cool tones independent of facial skin tone. Assess lip tissue for:
- Dark brown patches along the border
- Purple or blue undertones across the body of the lip
- Irregular, patchy natural coloration
In these cases, begin with PMU color neutralization. Apply warm orange or warm yellow tones first to lift dark cool areas to a neutral canvas before introducing target pinks or reds.
Eyeliner and Other PMU Applications
Eyeliner on deeper skin requires extreme depth control. Delicate eyelid tissue is prone to pigment migration if worked too deeply. Apply uniform light pressure, monitor saturation, and use steady hand movements across every cosmetic procedure.
Minimize Trauma and Support Healthy Healing
Protecting skin health during tattooing directly improves healed color retention and prevents tissue damage.
Why Overworking the Skin Can Be Counterproductive
Excessive passes, heavy pressure, and deep needle depth damage epidermal tissue. High inflammation causes swelling, excess scab formation, and heavy pigment loss. Gentle work leads to thin scabbing and far better pigment retention.
Understand Post-Inflammatory Hyperpigmentation
Post-Inflammatory Hyperpigmentation (PIH) occurs when skin creates extra melanin in response to injury or heavy inflammation. While not every client with dark skin develops PIH, aggressive technique increases this risk. Gentle technique and minimal trauma keep tissue calm and reduce unwanted darkening.
Set Realistic Healing Expectations
Fresh PMU looks dark, sharp, and intense immediately after application. Over the next few weeks, the outer skin layer heals, placing a natural melanin veil over the pigment. Teach clients to judge their final color only after 4 to 6 weeks of complete healing.
Advise clients to avoid picking scabs, excessive sun exposure and harsh skincare on treated area during healing to reduce PIH risk and preserve pigment retention.
Build a Personalized PMU Assessment Process
Following a structured step-by-step method ensures consistent safety and strong healed results for every client.
- Assess Skin Depth and Undertone: Identify if the skin leans warm, cool, neutral, or olive.
- Evaluate Skin Condition: Check oil production, thickness, texture, and elasticity.
- Check Natural Pigmentation and Existing PMU: Look for natural lip cool tones or old eyebrow pigment.
- Define the Desired Healed Result: Clarify how light, dark, or warm the final result should look.
- Select the Base Pigment: Pick a high-quality permanent makeup pigment for eyebrows, lips, or eyes.
- Determine Whether a Modifier or Neutralizer Is Needed: Add warm modifiers if cool shifts are likely.
- Adjust Depth, Pressure, Passes, and Saturation: Plan your needle speed, hand movement, and pass limit.
- Document and Review the Healed Result: Take clear photos at the 6-week touch-up. Maintain a personal database of your healed outcomes to refine your formula choices over time.
Keep PMU Procedures Safe and Professional
Cosmetic tattooing breaks the skin barrier, making health standards and safety protocols absolute priorities.
Use Appropriate Pigments and Follow Manufacturer Guidance
Select safe, professional-grade products designed specifically for micropigmentation. Read manufacturer safety sheets, verify lot numbers, check expiration dates, and follow local health regulations.
Follow Strict Hygiene and Infection-Control Practices
Use single-use sterile needles, dispose of contaminated items in biohazard containers, and protect your workstation with disposable barriers. Contaminated inks or poor sanitation can cause serious skin infections.
Screen Clients and Recognize Contraindications
Screen clients carefully during consultation. Identify medical conditions like keloid scarring tendencies, active skin lesions, or past adverse reactions. Refuse treatment or refer clients to a medical professional when safety concerns arise.
Note: Clients with melanin-rich skin have higher predisposition to keloid scarring, so thorough screening is critical during consultation.
Conclusion on PMU for Dark Skin Tones
Providing permanent makeup for clients with dark skin relies on tailored, thoughtful care. Pigment choice must account for surface depth, internal undertones, and past tattoo work. Physical success relies on light pressure, controlled pass counts, and shallow needle placement. By focusing on minimal trauma and accurate color theory, artists deliver clean, vivid, and long-lasting results across all skin tones.
Frequently Asked Questions About PMU on Dark Skin
Q1: What Pigment Is Best for PMU on Melanin-Rich Skin?
There is no single best pigment for dark skin. Selection depends on undertones, surface depth, tissue condition, existing pigment, and the specific application area.
Q2: Should PMU Artists Always Use Warm Pigments on Darker Skin?
Warm pigments help prevent cool or gray shifts, but they are not mandatory for every client. Use warm tones or modifiers only when cool undertones require balancing.
Q3: Does Darker Skin Require Deeper PMU Implantation?
No. Deep implantation causes ink to spread, blur, and shift to an unattractive blue or gray shade. Maintain light, consistent depth in the upper dermis regardless of skin color.
Q4: Can All PMU Techniques Be Performed on Melanin-Rich Skin?
Most techniques work well on dark skin when adapted properly. Suitability depends on individual skin oiliness, texture, tissue thickness, and past permanent makeup rather than skin shade alone.
